

How to install a cartridge
HP LaserJet Pro M304, M305, M404, M405 Toner - Replacement Toner Cartridge
Remove and replace the cartridge
Use the following steps to replace the toner cartridge.
Continue printing with the current cartridge until redistributing the toner by shaking the cartridge no longer produces acceptable print quality.
- Press the front door release button.
- Figure : Pressing the front door release button
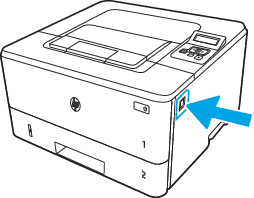
- Open the front door.
- Figure : Opening the front door

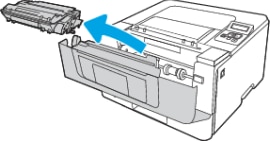
- Remove the used ink cartridge from the printer.
- Figure : Remove the cartridge from the printer.
- Remove the new ink cartridge package from the box, and then pull the release tab on the package.
- Figure : Pull the release tab on the package

- Remove the toner cartridge from the protective wrapper in the opened package. Put the used toner cartridge in the wrapper for recycling.
- Figure : Remove the cartridge from the opened package

- Hold the ink cartridge by both ends and shake it 5 to 6 times.
- Figure : Shake the ink cartridge

- Align the ink cartridge with the tracks inside the printer, and install it until it is firmly in place.
- Figure : Install the cartridge

- Close the front door.
- Figure : Close the front door

- Warning: Cartridges are distributed and used only within their intended area; It will not operate outside its designated area.
CAUTION: To prevent damage to the toner cartridge, do not expose it to light for more than a few minutes. Cover the green imaging drum, if the toner cartridge must be removed from the printer for an extended period of time.